Sunday, 11 February 2018

Spinach and feta pies

Here's a nice recipe to use up that random filo pastry you bought. I love Greek food and have found myself missing it as of late. So, I thought what better weekend lunch to prepare than a Greek Spanakopita (Greek for spinach pie). It's simple and quick to make, tastes delish, and reminds you of a sunny Greek beach in the midst of a chilly winter; what's not to love? 

This recipe only makes three triangle pies but if you want to make more, just increase the quantities and use more pastry sheets.


Ingredients
2 sheets filo pastry
6 ­­-8 approx. frozen spinach portions (defrosted)
100 g feta cheese (diced)
50 g butter (melted)
2 cloves garlic (crushed)
1-2 tbs olive oil

Method

1)      Preheat the oven to 180°C/350 F/ Gas 4 and line a baking tray with baking paper.
2)      Put the spinach in a sieve over a small mixing bowl. Using the back of a spoon, push the spinach slightly against the mesh of the sieve to squeeze the water out. Blot the spinach with kitchen paper to get rid of any water still hiding on the surface. Once you’re sure all the water has been squeezed out of the spinach, tip it out into a separate bowl.
3)      Heat the olive oil in a frying pan and add the garlic. Fry for 1-2 minutes on a medium heat until golden. Add the garlic to the spinach along with the feta cheese. Rub the mixture together with your fingers, crushing the feta cheese cubes into the spinach.
4)      Place 1 sheet of filo pastry on the work surface with the longest edge facing you. Brush with butter and place the other sheet on top, brushing this one with butter too. With a sharp knife, cut the buttered pastry vertically into three equal sections.
5)      Place 1-2 tablespoons of the spinach and feta filling onto the top left corner of one of the sections and fold the pastry over to meet the other side, making a triangular shape. Continue to fold the triangle down the length of the pastry until you reach the end. Cut off any excess pastry and pat down the edges to close any big gaps. Repeat with the other two sections.
6)      Place the triangles on the baking tray and brush generously with butter. Bake on the middle shelf for 20-25 minutes until golden brown. Allow to cool a little bit before enjoying 😊.


Tip

·        If you have any pastry and filling leftover, you could try doing a spiral-shaped pie: Layer 2 pieces of filo pastry on top of each other, using melted butter to stick them together. Cut a square out of the pastry and brush the top layer with more butter. Dot some spinach and feta filling along one edge and spread it down the length with your fingers so there’s no gaps. Tightly fold the pastry over the filling and continue to roll it up to the other end into a sausage shape. Brush this with more melted butter and, starting from the end closest to you, roll the sausage up into a spiral. Bake for 20-25 minutes until golden. As you can see from my photo, filo pastry tends to crack very easily when you roll it up in this way, so if you are going to choose this shape, you should work quickly and aim not to leave the filo pastry sitting on the side too long (exposure to air makes the pastry go dry).

Monday, 12 June 2017

Fruity Tea Loaf

Have you ever baked something that came out of the oven perfect and tasted divine, to then lose the recipe and never be able to bake it again? Yeah. That’s what happened to me with this fruity tea loaf. I can’t remember where I found this recipe on the internet but whoever originally posted this, I thank you from the bottom of my heart because it is the best tea loaf I have ever had the pleasure to bake and eat. Luckily, I found the recipe recently on a scrappy piece of paper hidden among a collection of random stuff in our kitchen. There was no title on the page, just a simple list of ingredients and vague instructions. The best kind of kitchen mystery!

So without further ado, here is an essential tea loaf recipe...

First thing to note is this recipe uses the American cup system, something I have struggled with over the years. I just have not been able to comprehend how the Americans can rely on cup measurements when cups vary in size! Grams and ounces just feels a lot more reassuring to the baker who craves specificity to avoid cake failures. Anyway, I let my own measurement anxieties go and chose a mug with which I would measure all my ingredients. My advice would be, it is a mug you need, not a cup. If it feels too dainty, it is not a mug. This is what I used for my 'cup':


Ingredients


1 cup water infused with a tea back (just normal English breakfast style please)
4 cups sultanas
1 cup caster sugar
¾ cup butter (cut butter into cubes to get an accurate measurement)
2 cups plain flour
1 teaspoon bicarbonate of soda
1 teaspoon mixed spice
2 eggs, beaten

Method

1)      Preheat the oven to 150°C/ 300 F/ Gas Mark 2. Line a 9 x 5 inch loaf tin with baking paper or a made to fit paper case.

2)      Heat the black tea, sultanas, sugar and butter in a large saucepan. Bring this mixture to the boil and simmer for 10 minutes, stirring regularly. Take off the heat and allow to cool for a few minutes.

3)      Meanwhile, sift the flour, bicarbonate of soda and mixed spice into a wide mixing bowl. Make a well in the middle of the dry ingredients and pour in the wet mixture. Throw in the beaten eggs and quickly stir everything together to avoid the heat of the liquid cooking the eggs.

4)      Once everything is well combined spoon the cake mixture into the loaf tin and even the top with the back of a spoon. Place on the middle shelf in the oven for 1 hour 30-50 minutes. After 1 hour place foil over the top of the cake to prevent it burning. At the 1 hour 30 minutes mark, test the cake with a knife or skewer. If the skewer comes out clean the cake is baked, however if some batter remains on the skewer leave the cake in a bit longer. Once baked, allow the cake to cool in the loaf tin.


5)      Slice into generous slices and serve with a nice cup of tea. This loaf cake is nice with a spreading of butter.

Tuesday, 23 May 2017

Chocolate Chip Madeleines


Today marked a special occasion: the day I went back to baking for the first time in… well a long time for me. I’ve been so busy with my Master’s degree that, unfortunately, baking has fallen to the wayside. But today I finished an assignment and didn’t quite fancy going back to my other studying so I thought today was the day that I got cracking the eggs into my mixing bowl again. So, what did I bake I hear you say? Well I’ve had a madeleine tray in the cupboard for a long time so I thought I’d dust that off!
Being as it was actually my first time making madeleines, I used Michel Roux Jr’s recipe, however replaced his preferred lemon flavour with vanilla and chocolate chips.
Oh and another thing… just as I was melting my butter I found out (much to my Angel delight) that the battery on the scales was completely gone. I was forced to guestimate with tablespoons instead. Luckily everything turned out smoothly (or springy to the touch and light as you will soon find out).

Before you go any further, make sure you have a madeleine tray!


Here's my version of  Michel Roux Jr's madeleines, complete with tablespoon measurements: 

100g caster sugar (8 level tablespoons)
100g butter, melted (use the measurements on the block to help you)
100g plain flour (8 level tablespoons)
2 eggs
¾ teaspoon baking powder
1 teaspoon vanilla extract
25g chocolate chips (either pick one type or mix ‘n’ match)
-1 tablespoon extra melted butter and plain flour for dusting the madeleine tray.
-icing sugar to decorate

Method

1)      Melt the extra tablespoon of butter and brush around a madeleine tray with a pastry brush. Sieve a couple of tablespoons of flour over the madeleine tray and tap off any excess.

2)      Preheat the oven to Gas 6/ 200°C/ 400F. Whisk the eggs and caster sugar together in a mixing bowl until frothy and slightly thickened. Sieve in the flour and baking powder, and add the vanilla extract and melted butter. Fold everything together gently with a spatula and leave to rest for 20 minutes.

3)      Stir through the batter once more and carefully fill the holes in the madeleine tray. Sprinkle a few chocolate chips over the top of each madeleine and push in slightly with your finger. Bake the madeleines on the middle shelf of the oven for 8-10 minutes until risen and springy to the touch.

4)      Once baked, leave the madeleines to cool for a couple of minutes before carefully taking them out of the tray and placing on a cooling rack. You may need to trim the edges of the madeleines before you take them out if you overfilled the tray like I did! (Note: don’t overfill the madeleine tray because batter rises in the oven…)


5)      Once cooled, dust the these cute little French cakes with a dash of icing sugar and enjoy with a  cup of tea or coffee.

Friday, 16 September 2016

Lemon and white chocolate biscuits

I went on a shopping trip the other day and of course what happens when you go and randomly browse the shops? Yes, you come back with something completely random. And that’s exactly what happened to me. I went shopping with my best friend and we made the mistake of going in the cookware shop in town which had a few discount baskets…and the next thing I knew I’d left the shop with a cookie stamp, with which you can stamp your very own messages onto your bakes. Before I picked this little gem up I didn’t need anything but once it was in my hand I just couldn’t imagine my baking cupboard without it. So of course I had to make some biscuits to test it out.
I used the basic biscuit dough recipe on the BBC website (find it here), but tweaked it a little, halving the butter and sugar, adding a tad more flour but keeping the same amount of egg. The basic biscuit dough on the BBC website is just a canvas, upon which you can add whatever flavours you want. I chose lemon and white chocolate.
These biscuits are perfect for a light afternoon treat with your cuppa.

Ingredients
125g softened butter
70g caster sugar
1 egg yolk
160g plain flour
1 teaspoon lemon juice
Zest of a lemon
100g white chocolate

Method:
   1)    Grease and line a baking tray with grease-proof paper. Preheat the oven to 170°C/Gas 4. Cream the butter, sugar and lemon zest together until light and fluffy. Mix in the egg yolk and then gradually sieve in the flour, mixing after each addition. When the dough gets stiffer to stir, get in there with your hands and gently knead the rest of the flour in. The dough will be softer than a normal biscuit dough but still mouldable. Wrap the dough in cling-film and refrigerate for 20-30 minutes.
2)   Take half of the dough and roll out to the thickness of a £1 coin. Cut out 3-4 inch rounds with a fluted cookie cutter (I find the crimped edges these cutters create, hold the melted chocolate a lot more).
3)   If you have a cookie stamp, now would be the time to use it! Once you’re happy with the design of your biscuits place them on the baking tray, leaving a few centimetres between each one. Bake for 13-16 minutes until the edges are brown but the tops are only a tiny bit golden. Leave to cool on a wire rack. You’ll find you need to do about 3 batches of baking.
4)  Place a sheet of grease-proof paper on a couple of trays. Melt the white chocolate in the microwave or in a bowl over a pan of simmering water. Allow to cool a little bit. Take a biscuit and twirl it so that only the edges get covered in chocolate and then place on the tray to set. To speed up the setting process, put the biscuits in the fridge for half an hour.
5)     Boil the kettle, get the tea or coffee out and enjoy.

Sunday, 3 July 2016

Salted Caramel Brownies – Belgian style!


In the past I have had a love-hate relationship with brownies. Love, in the sense that I loooooovveee eating them. Hate, in the sense that any brownie mixtures I tend to make HATE me and the resulting brownie is always too much on the underbaked side.
However, I ran into this little recipe by Asda Good Living, claiming to be the ‘ultimate’ recipe so, naturally, I just had to give it a go. This recipe informs bakers to plunge their tray of fresh from the oven brownies into a tray of cold water to start rapidly cooling them. This sounded a bit extreme but once I tried it I never went back. I’m not sure on the science aspect of this but, in my head, it would make the sugar crystals seize up a lot quicker, hence helping the brownie set. Whatever the scientific reason, it works and that's all I need to know.

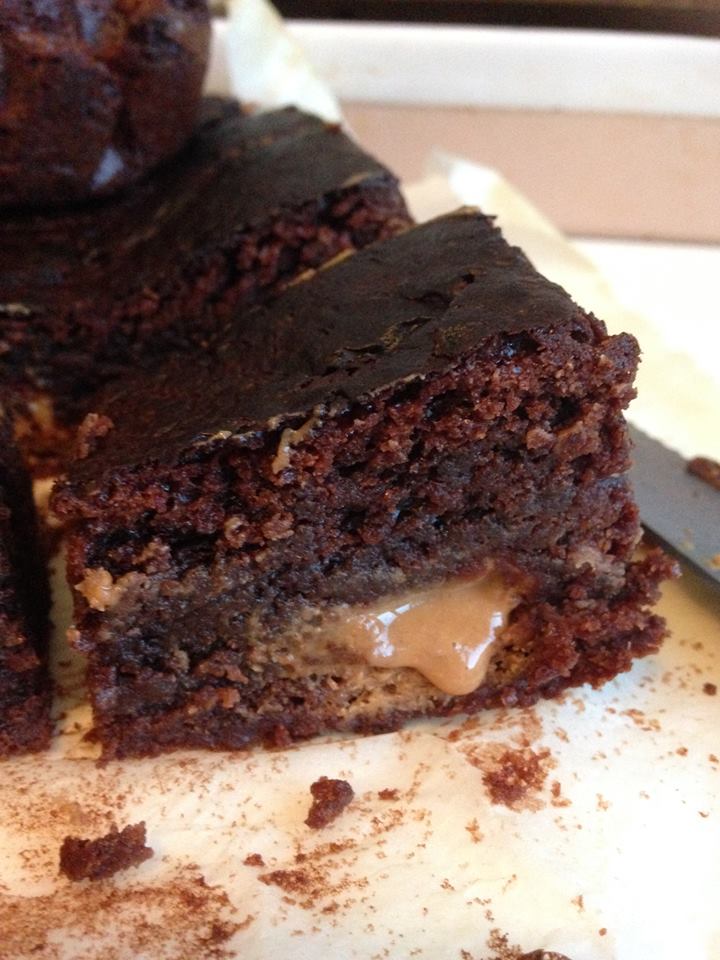
As well as chocolate brownies, I wanted to do something with this product.......Lotus Biscoff spread! If you haven't heard of this stuff you should educate yourself. You know those caramelly little biscuits you get with your coffee in a cafe? Well..lesson 1: that is called a Speculoo and it comes from Belgium. Lesson 2: there's a spreadable version. And whilst in Belgium, I thought it only right to do something with this little beauty.

So I went on the Lotus Biscoff website and found this recipe, which involves creating lotus balls of goodness (go with me on this one) and submerging them in the luscious brownie mixture. I was sceptical at first too.
So I combined the 'ultimate' brownie recipe I adopted recently with the above 'lotus balls' recipe, made a few tweeks of my own and hey presto, I give you my own version...with the added twist of the salted caramel flavour rather than just plain Jane.
Here's what I did and how you can make it too:

Ingredients:


Brownie mixture: 
225g plain chocolate
225g butter
3 eggs + 1egg yolk
275g light brown muscovado sugar
125g plain flour
1 teaspoon baking powder
1 teaspoon salt
Lotus Biscoff spread spheres:
100g smooth lotus spread
100g icing sugar
1/2 teaspoon salt.
To decorate:
100g white chocolate
2 tablespoons smooth Lotus Biscoff Spread
1-2 Lotus Biscoff Original caramelised biscuits, bashed up
sprinkle of salt
Method:

1) First, make the Lotus Biscoff spread spheres: In a small bowl, mix the lotus spread with enough of the icing sugar to create a pliable dough, similar to fondant icing. Divide the mixture into conker-sized spheres. Place on a plate and sprinkle with the salt.


 2)Make the brownie mixture: Preheat the oven to 180°C/Gas 4 and line a square tin with baking paper. Chop the chocolate and, along with the butter, place in a heatproof bowl set over a pan of just simmering water. Do not allow the water to touch the bottom of the bowl.


3) Meanwhile, whisk the eggs and
egg yolk for a few minutes until thickened and frothy. Add the sugar and whisk to combine.
4) Once melted together, pour the chocolate and butter mixture into the eggs and sugar and gently fold through.
5) Carefully fold through the flour, baking powder and salt.
6)Pour the brownie batter into the tin and disperse the lotus spread spheres evenly throughout. Bake in the middle of the oven for 45 minutes. You may need to place tin foil over the top of the brownie at the 30-minute mark to prevent the top from burning. When a knife or cocktail stick comes out clean, your brownies are baked. Fill a roasting tin, or something similar, halfway with really COLD water. Once baked, immediately place your brownie tin into the cold water and allow to sit in this until completely cold (obviously don't let any water actually touch the brownies). Cut into squares.

7) To decorate, melt the white chocolate with the 2 tablespoons of Lotus Biscoff spread in a heatproof bowl set over a pan of simmering water. Stir occasionally. Once melted take off the heat and allow to cool for 5-10 minutes before pouring into a disposable piping bag. Snip a narrow end off of the bag and pipe drizzly lines over your brownie squares. Alternatively, just use a teaspoon for this. Sprinkle with the biscuit pieces, another sprinkle of salt and allow to set.

Tips:
*enjoy warm with vanilla ice-cream.
*an electric hand-mixer can be useful to whisk the eggs in step 3.
*a microwave can be used to melt the chocolate and butter/Lotus spread in steps 2 and 7, however, DO NOT leave the microwave alone and check and stir the chocolate at least every 10 seconds if you do go for this method of melting.


Sunday, 24 April 2016

Rocky Road (UK name: Chocolate Tiffin)


So it’s a rainy day in Brussels (honestly the weather here is more confused than in London and that’s saying something). It's literally rained 4 times today and the sun has come out 5 times. I know what you're thinking- trust the Brit to make a point about the weather in a blog. I'm telling you though, us Brits are onto something because the weather here really is a good talking point! So in this confused weather day I decided to have tea, biscuits and update my baking blog. It's a very British past-time I'll admit.
When I moved to Brussels a month ago (albeit temporarily), I came with the fierce attitude that no matter the limits in my baking equipment, I would still manage to bake. I came true on this though I'm not going to lie- it’s been more EFFORT than usual. So far I've made cookies, cupcakes and rocky road, not bad going…So now for the next step- to crack out the laptop and actually write something down!
Now this week this bake has caused some confusion- it seems a lot of people don't actually know what rocky road is!! Well let me educate you about this gorgeously chocolatey sugary goodness bite of heaven. It's just chocolate, butter, syrup, biscuits and all things sweet meted down and mixed up and cut into bite-sized squares. It originates from America but when the British adopted it, they rather appropriately gave it the posh name of a 'Tiffin'. Call it what you want guys, as long as you enjoy it that's all that counts ;). For all those baking-shy people this is the best thing for beginners- there's no oven involved so you CANNOT FAIL. Give it a go. You'll love it.

INGREDIENTS

250g chocolate (mixture of milk and dark)
125g butter (unsalted)
1-2 tablespoons of golden syrup/ honey/any other syrup
200g crushed biscuits (any you like)
100g marshmallows
-anything else you want to add (such as dried fruit, nuts, other chocolate or sweets)

METHOD


1)      Line a square tin (or anything you have) with cling film, using a dash of butter to make it stick. Set aside.
2)      Bring a pan of water to the boil and turn down the heat to a simmer. Chop the chocolate into small pieces and dice the butter into cubes. Place chocolate and butter into a heatproof bowl with the syrup. Place over the pan of simmering water, making sure the surface of the water DOES NOT TOUCH the bottom of the bowl (the chocolate will burn otherwise). Allow the ingredients to melt, stirring only occasionally. Once melted take the bowl off the heat and set aside to cool down slightly.
3)      Meanwhile break or crush up your biscuits in a big(ish) mixing bowl. It’s up to you how far you go with this; if you like chunks of biscuit then only break them up but if you prefer them to blend in more with the chocolate mix, go wild with a rolling pin/ mallet/ brick (just joking about this one).
4)      Pour the chocolate into the biscuits and mix to combine. Next chop up the marshmallows and any other ingredients you so desire, and stir into the mixture.
5)      Pour the rocky road mixture into the tin and flatten down with a spatula. Allow to cool properly for an hour or so before putting in the fridge to set for 2-3 hours minimum. Once properly set, run a large sharp knife under hot water (yeah you don't want to mess with this girl!), wipe and cut the rocky road into your desired portions. This will keep for a week or so in the fridge.
6)      Dish out to friends and colleagues to fatten them up (optional).

                                                                     TIPS AND TRICKS
*Going the extra mile: if you fancy being a bit..well…fancy…why not decorate the top of your rocky road? As Mary Berry says, it’s always better to show a bit of what’s on the inside on the outside! I was using this bake as an excuse to use up some leftover chocolate so I went mental with the decoration. A good technique to use is the following: after flattening the surface of the rocky road in step (5) melt down about 100g chocolate and drizzle about half of it over the surface of the rocky road. This will act like a glue to attach your toppings. Add whatever toppings you want, such as chocolate buttons, bits of broken biscuit, extra marshmallows etc. Then drizzle the other half of the melted chocolate over the top in as artistic a fashion as you can manage. I find using a contrasting chocolate to the one you used in the actual rocky road looks nice here (ie milk on white, white on dark). Trust me, the contrast looks very fetching to the eye ;)…as if a cake of chocolate and sheer sugar isn’t fetching enough to the eye!

*FANCY FINISH: Once you’ve cut up your rocky road, dust with icing sugar to give it a finished Starbucksy kind of finish.


Monday, 11 January 2016

A Classic: Victoria Sponge

To start off the New Year I thought I’d go for a classic bake – the Victoria Sponge. I made this for my Nan’s birthday a few days ago on request. After all of the indulgent flavours of the Christmas season it was nice to go back to basics with a nice fluffy sponge sandwiched with fruity jam and a light butter cream. This cake really is perfect for those January babies who don’t want a birthday cake too heavy. Or you can use it as a base for an iced extravaganza. Your choice.
Rather than creaming the butter and sugar first before adding the flour and eggs, this time I went for the all-in-one method which I previously criticized. Turns out it doesn’t really matter how you mix a sponge. The trick is not to over-mix it!
I have also opted for the longer-lasting butter cream filling as opposed to fresh cream. But if you know the Vicky sponge won't last more than 2 days crack out the whipping cream!

Cake Ingredients
6 oz / 150g margarine or soft butter
6 oz / 150g caster sugar
6 oz / 150g self-raising flour
3 eggs
1 teaspoon vanilla extract
Filling
5-6 tablespoons strawberry or raspberry jam
6 oz / 150g icing sugar
3oz / 75g softened butter
1 teaspoon vanilla extract
-dash of milk

Method
1) Grease and line two sandwich cake tins and preheat the oven to 180°C / Gas mark 5.

2) Put all cake ingredients in a mixing bowl and mix with an electric mixer or hand beater for approximately 2 minutes until everything is incorporated and a smooth light batter is achieved (I'm talking drop-off-the-spoon consistency...). Divide between the sandwich tins and bake for 20-25 minutes until slightly shrunken away from the sides and springy to the touch. Turn out onto a wire rack and allow to cool.

3) With an electric hand beater fluff up the butter. Add the vanilla extract and gradually sieve in the icing sugar, mixing after each addition. It may be necessary to add a dash of milk every now and then to loosen it up a bit. Once all the icing sugar is added continue to beat the icing until pale and spreadable- a couple of minute should do.


4) Spread the jam generously on one of the upturned cakes. Spread the other cake with the butter cream and sandwich them together – whether you have the jam or butter cream on top is entirely up to you! Dust liberally with icing sugar. Gorgeous.

Tuesday, 8 September 2015

Muffins


So hey. I've not posted in a while and it's the first time I've posted from my flash new phone (just an iPhone 5c, don't get excited). Anyway I made some nice muffins today which was a complete surprise because I always thought that this perfectly round-topped fluffy light creation was the stuff of Starbucks dream world. I found out today that this ideal baked good is not so unachievable as we all think. The recipe I found was from littlesweetbaker and the ingredients are all in cups. If you are clever and have a contraption with the cup measurements on it, use that. If you're like me just pick a mug - any mug- and use it to measure everything where the word 'cup' is mentioned. 
In the rewrite here I missed out bicarbonate of soda from the original recipe purely because I didn't have any and I wrote the oven temperature which I used on my oven after translating it. The article along with the recipe on littlesweetbaker.com discusses how to achieve that bakery style idealised iconic muffin we all dream of and apparently it's simply down to raising agents and temperature: the raising agent to make the batter rise and the high temperature at the beginning of the bake to make that top spring out straight away. Obviously after that happens it becomes necessary to turn down the heat to avoid book ends for muffins. If you want to read it for yourself go ahead, very interesting stuff! And if you're reading this littlesweetbaker...props to you! 

Here's the recipe anyway: 

2 1/2 cups plain flour
1 tablespoon baking powder
1/2 teaspoon salt
1 cup milk
1 cup sugar
1 tablespoon vanilla extract
1/2 cup butter (melted)
2 eggs (beaten)
1 cup chocolate chips

1) Preheat oven to 220 degrees / gas 5. Line a 12 hole muffin tin with paper cases.
2) Place the flour, baking powder and salt into a big mixing bowl and stir to combine. Mix through the chocolate chips and set aside.
3) In another bowl, mix together the sugar, eggs, milk, vanilla and melted butter. Gradually pour into the dry ingredients, stirring as you go. Once both wet and dry ingredients are just combined, stop what you're doing and take a step back.
4) Divide the mixture between the 12 cases, filling them right to the top. Bake in the oven for 5 minutes and then turn the temperature down to 180 degrees or Gas 4. Bake for a further 15 to minutes. Once springy to the touch get the muffins out of the oven and allow to cool or eat warm.

Friday, 24 July 2015

Chocolate Brownies or 'Brazzies'

Wow it’s been a while since my last blog post. When I last posted I was a week away from finishing my university final year exams, probably bored stiff of film and Greek revision so baked a cake to remain sane. So much has happened since then; I finished said exams, moved out, got my final degree classification and completely graduated from university (gown an’ all). So now that’s all done with I thought it was time to get back on the baking sharing thing. It’s not that I haven’t baked anything since my last post in May – BELIEVE ME there have been cookies and cakes baking in my oven since then- but I just had no energy to write about them after. But now I’m back on the baking blog writing wagon. For now.

So what better way to get back on track than with a brownie recipe that actually works.
Now, I think I can confidently say ‘I can bake’. But I have to say the humble brownie has always been something that I’ve not been that good at baking; you could say it is my Achilles heel in my baking arsenal. I have simply never been able to achieve that crunchy topped, chewy but not gooey brownie. Instead I have always achieved this very under-baked style brownie which is fine around the edges but a half-baked gooey nightmare in the middle. Don’t get me wrong I’m a huge fan of under-baking, for example in the loyal cookie (who wants a crunchy cookie over that dreamy chewy number we all know and love?), however in this case I would say my brownies have always been TOO under-baked. So you can imagine when I found the following recipe I was sceptical. Firstly the title of the book in which I found the recipe sounds dodgy: ‘Perfect Cakes Every Time’ along with the byline: ‘…guaranteed to succeed!’
I mean those are some bold statements right? When I saw this in the shop I just had to put it to the test. Once home I was flicking through the unillustrated pages of classic recipes when I stumbled across a recipe for ‘Rich Fudge Brownies’. I thought ‘hmm that’s always something I’ve fallen short of the mark of…so let’s put this failsafe status to the test!’
And I’m happy to say that I have now used this recipe three times and it has worked every.single.time!! Woop I am no longer a brownie baker failure!

Now the concept of this book really is very good. Apparently a newly-wed Victoria Combe baked a horrendous cake for her in-laws and, in despair, wrote a plea to readers of the Daily Telegraph for recipes that she could not mess up. Subsequently readers of said newspaper sent in their cherished and fool-proof recipes to help her out and of course her baking improved. THEN she put all of these recipes together into the book which I now hold in my hands ‘Perfect Cakes Every Time’. So even though this is a big statement I think we can all have a little faith that these recipes…well they clearly know what they’re talking about!

Now I have to say a big thanks to ‘Karin Smith from Reading, Berkshire’, who sent this recipe into this charity baking mission. It truly is fab. The only thing I tweaked was the sugar. Firstly I tried the recipe straight with the caster sugar it suggests, and they came out well if a little lighter in colour to what I’m used to. So the next time I used light brown muscovado sugar to add more density in colour and flavour and I haven’t looked back since. I find muscovado sugar always adds to the chewy element of baled goods too, hence why it is used in the likes of cookies and other chewy nuggets of joy. As well as this I’ve messed about with adding choc chips too and I find doubling the ingredients is always a better idea. THIS TIME however I dipped some of my brownie cubes in chocolate and hundreds and thousands to channel that well-loved chocolate drop sweet ‘Jazzies’; I call these beauties ‘Brazzies’. I did leave half of them naked though because my Mum was disgusted I had the audacity to pimp a brownie. Let’s just say we have agreed to disagree.

So here’s the recipe from this book (in doubled format):

200g / 8 oz plain chocolate
100g / 4 oz unsalted butter
4 eggs
300g / 12 oz light brown muscovado sugar
1-2 teaspoons vanilla extact
150g / 6 oz self-raising flour
·     100g / 4 oz  chopped walnuts/ chocolate chips (optional)
·         For ‘Brazzies’: 100g / 4 oz melted chocolate and a bowl of hundreds and thousands.

1) Preheat oven to 180°C / Gas Mark 4. Grease and line a 9x9”/22x22cm square baking tin.
2) Melt the chocolate in a heatproof bowl over a pan of simmering water. Once melted add in the cutter bit by bit and stir to combine to a smooth chocolatey silky bowl of joy.
3) Whisk the eggs, sugar and vanilla extract together until pale. Pour in the chocolate mixture and whisk to combine.
4) Sieve in the flour and use a metal spoon to fold everything lightly together. Now stir in any nuts or chocolate chips you desire. Pour into the tin, leveling off with a spatula. Bake for 30-40 minutes. The brownie is baked when the surface is crispy and cracking, pulling away from the sides a little and not wobbly when shaken slightly. Allow to cool in the tin until cold before cutting up.

5) For ‘Brazzies’: Melt chocolate as above and pour hundreds and thousands into a bowl. Dip the bottom of each brownie cube into the melted chocolate and then into the sprinkles. Leave to set, dipped side up.

Enjoy x

Thursday, 14 May 2015

Raspberry and Apple Country Crumble Slice

I made this traybake with wholemeal flour for a change, something I've never used before but I've always heard is supposed to seriously pimp up any normal cake mixture. And I can safely say it does! The wholemeal flour definitely adds an extra nutty layer to the cake flavour and goes really well with anything fruity. Plus the use of less refined sugar and flour always makes you feel that tad bit healthier even if you are still eating cake ;). Here's my recipe:


For the cake:
250g / 10 oz light brown muscovado sugar
250g / 10 oz margarine
1 teaspoon vanilla extract
5 eggs (beaten together)
250g / 10 oz wholemeal self-raising flour
75g / 3 oz sultanas
1 green apple (Granny Smith’s)
50g / 2 oz raspberries (each one cut in half)

Crumble Topping:
 75g / 3 oz butter (chilled)
150g / 6 oz plain flour
40g/ 1 ½ oz demerara sugar

Icing:
6 tablespoons icing sugar
3-4 teaspoons water (more or less, go by eye rather than recipe with this one)

Method
1) Grease and line a 12 x 9 rectangular tray-bake tray with baking paper and set aside. Preheat the oven to 180°C / Gas 4.
2) Make the cake batter: Cream the margarine, vanilla extract and muscovado sugar together until pale and fluffy. Add the beaten egg and wholemeal flour bit by bit, mixing after each addition. Once combined, stir through the sultanas.
3) Make the crumble topping: Dice the butter and rub into the plain flour until a breadcrumb consistency has been achieved. Stir through the demerara sugar.

4) Spread half of the cake batter into the tin, leveling it off nicely. Peel, core and cut the apple into four wedges. With a vegetable peeler, peel length-ways down the apple wedge to get extra thin apple slices.

Use two apple wedges for the middle layer of fruit, distributing the thin slices evenly onto the cake batter.


 Follow with half of the raspberries. Spread the rest of the batter evenly over the layer of fruit. Peel the last two apple wedges and scatter slices over the top along with the rest of the raspberries.
Sprinkle the crumble topping over the top fruit layer, pressing down lightly. 


5) Bake for 40-50 minutes, until golden, springy to the touch and an inserted skewer comes out clean.

  Top tip: Place a bit of foil on top of the cake after thirty minutes to prevent further colouring on the top – just because it looks golden and lovely on the top doesn’t mean it’s cooked all the way through yet!

6) Once baked, allow to cool in the tin for 10-15 minutes, before tipping out onto a cooling rack. Sprinkle liberally with more demerara sugar and cut into squares.

7) Make the icing: Sieve the icing sugar into a bowl and gradually add the water, until it reaches a thick pipeable consistency. Pipe or drizzle the icing over the squares with a spoon. Store in the fridge to retain the fresh flavour of the fruit. Simply eat with a cup of tea, or warm up in the microwave and serve with ice-cream or custard for a lovely dessert.


Tuesday, 12 May 2015

Chewy Red Velvet Cookies: Take 2


 So once upon a time I stumbled across a great recipe for chewy chocolate chip cookies. See the recipe here. Back then I did traditional vanilla cookie dough with chocolate chips. But this time I added a little twist to the mix to make red velvet chewy goodness. I have made red velvet ones before but I didn’t think they were red enough; so this time I made sure to use a food colouring PASTE rather than the liquid stuff (Trust me, once you try pastes you’ll never go back). The great thing about making different flavour cookies is that for minimal ‘pimpage’ of the cookie dough, you get drastic results. In this case for red velvet cookies, simply take out 1 oz/ 25g flour and replace with 1 oz / 25g cocoa powder, add red food colouring, ALWAYS compliment with white chocolate chips and you’re sorted.

Anyways here’s the recipe as I have noted down in my recipe folder:

9 oz / 225g plain flour
1 oz / 25 g cocoa powder
7 oz / 170g butter (melted)
8 oz / 200g light brown muscovado sugar
4 oz / 100g caster sugar
½ teaspoon bicarbonate of soda
1 egg & 1 egg yolk
1 teaspoon vanilla extract
6 oz / 150g white chocolate chips (though the amount of chocolate one uses is obviously not set in stone…)
*red food colouring (pastes are more expensive but stretch further, but liquid form colourings are also good)

1) Preheat oven to 170°C / Gas 4. Grease and line a baking tray and set aside.

2) In a bowl mix the egg, egg yolk, vanilla extract and sugars together and beat until pale (an electric hand whisk does the best job here). Stir through the melted butter. Sieve in the flour, cocoa powder and bicarbonate of soda until combined. Colour the dough with the red food colouring- how red you want them is really up to you. Fold through the white chocolate chips.


3) Take one tablespoon for each cookie portion and place four on the tray, spaced well apart. Flatten the heaps of dough slightly and bake in the oven for 10-12 mins, until the cookies are visibly set around the edges but still slightly doughy in the middle. Allow to cool slightly on the tray before placing on a wire rack to cool. Repeat with the remaining dough. If you prefer a crunchier cookie, cook for a couple of minutes longer until the cookies are more set.

Friday, 24 April 2015

Post-Easter Marble Cake


Here's my recipe for a marble cake I made the other day during a revision/ coursework break. I had LOADS of chocolate left over from Easter so I literally plastered the top of my cake with it.  I suggest you do the same! Enjoy :)
For the Cake
8oz / 200g caster sugar
8 oz / 200g margarine
8 oz / 200g self-raising flour
4 eggs
3 tablespoons cocoa powder (+ 4-5 tablespoons milk)
1 teaspoon vanilla extract

White Chocolate Buttercream
4 oz / 100g white chocolate
4 oz / 100g unsalted butter
8 oz / 200g icing sugar
Dash of milk
Dark chocolate Buttercream
4 oz / 100g dark chocolate
4oz / 100g butter
8 oz / 200g icing sugar
Dash of milk
*broken up chocolate of choice to decorate


1) Preheat oven to 180C / 170 Fan/ Gas 4. Grease and line two cake sandwich tins and set aside.
2) Make the cakes: Cream margarine and caster sugar together until pale and fluffy. In a separate bowl beat the eggs. Gradually sieve the flour into the butter-sugar mixture, adding a bit of egg and mixing with each addition. Once all flour and egg is incorporated thoroughly stop mixing the batter.
3) Put half the cake mixture into another bowl. In a mixing jug or something similar mix the cocoa powder with the milk, until a thick paste has been achieved. If it is does achieve this and is still too powdery add a dash more milk – try to be sparing with the milk as you go so you don’t reach a situation where you have to add loads more cocoa to compensate for adding too much milk!
4) Add this cocoa paste to one half of your cake batter with a teaspoon more flour to prevent curdling. Mix until a beautiful chocolatey brown had been achieved. Add the vanilla extract to the other half of the batter with a dash more flour, again to prevent curdling.
5) Randomly drop spoonfuls of both of the batters in the tins- this is a marble cake remember! Ones you’ve spooned all the batter into the tins, it’s time to marble: with a cocktail stick or a knife, start on one side of the tin and make horizontal cuts through the batter like a zig-zag pattern. This should make a nice rippling effect through the batter.
6) Bake the cakes for 20-25 minutes until springy to the touch or an inserted skewer comes out clean. Turn out onto a wire rack and allow to cool.
7) Make the Icings (or just one if you can’t be bothered): Whichever icing(s) you decide on making do the following: Break up the chocolate and melt, either in the microwave (watch it though!), or over a pan of gently simmering water. Allow to cool. In a bowl, cream the butter with a dash of milk until softened. Gradually sieve in half of the icing sugar, beating after each addition. Next mix in the chosen chocolate, followed by the rest of the icing sugar. The result should be a smooth, spreadable gloriously chocolately smelling icing. Either make two batches of the same icing or use two batches of icing with different chocolate (as I have) to continue the ‘marble’ theme. Use the icings to fill and decorate your cake as desired – I used a bit of both in the middle and on the top of mine to continue the rippled effect. Next bash up some chocolate and scatter, stick it, grate it, sprinkle it, chuck it (however you treat your chocolate is your own preference) on top of your cake. For an extra ‘TA DAAA!’ factor, sprinkle with glitter and the like.
8) Cut a massive slice and drink with a nice cup of tea. Chef perks an all that ;). 

Monday, 16 March 2015

Rainbow Checkerboard Cake

 OK so I've been away for a while because I thought this next recipe would be really complicated to write and I just couldn't bring myself to write it. But then I realised...actually it's dead simple. There's only a few ingredients, a few colourings and it's sorted. So if you're looking for a simple cake with the wow factor (and maybe some hyperactive children depending which food colourings you use) read on!

Tips before you start: be prepared to make three batches of cake mix in a go. One cake mix makes 2 sponges. It's better to do two cakes at a time because it's easier to divide a mix in half than it is into 6, and also you don't end up with cake mix on your kitchen ceiling - a possibility if you have a stand mixer as strong as mine. Anyway once you've done one cake mix and the two cakes are in the oven, get started on the next one. Carry on like this and dance to some music while you do it. I find Disney Enchanted 'Happy Working Song' does the trick. I'm not even ashamed  to admit it.

Oh and FYI you don't have to use an electric mixer at all but due to the volume of cake it did make my life easier...

And one last thing: make sure you keep track on your colours. I found it easier to do the cold colours (blue, purple, green) first and then the warm colours (yellow, orange, red).

Ingredients

Cake: 3 quantities of the following:
 6 oz / 150g caster sugar
 6 oz / 150g margarine
 6 oz / 150g self-raising flour
  3 eggs (beaten)
1 teaspoon vanilla extract

*food colourings: red, blue, yellow (you can use these to make the purple, orange and green - or just buy these too)

Buttercream Icing
20 oz / 500g icing sugar
10 oz / 250g soft unsalted butter
4-6 tablespoons milk
1 teaspoon vanilla extract

Royal Icing
18 oz / 450g icing sugar
2 egg whites
1 teaspoon glycerine
2 teaspoons lemon juice

Equipment:  2 circular cutters: 5 cm and another 10cm approx.

Method
1) For the Sponge Cakes: Grease and line two sandwich tins and set aside. Preheat the oven to 180C /170 Fan/ Gas 4. Cream the margarine, caster sugar and vanilla extract together until pale and fluffy. Gradually mix in half the beaten eggs, only adding a little at a time to prevent the mixture curdling. Sieve half of the flour into the mixture and lightly beat in. Repeat with the rest of the eggs and flour until all cake ingredients are mixed together. Place half the mixture into another bowl and tint with your colour of choice. Bake the sponges in the middle of the oven for 20-25 minutes, until springy to the touch and an inserted skewer comes out clean. Turn out onto a cooling rack. Repeat twice more with the other colours. Once cooled trim the brown crust off the sponges to reveal the bold colours underneath.

2) Make the Buttercream Icing: Beat the butter, vanilla extract and a little of the milk together to soften everything together. Gradually sieve in a little icing sugar at a time, beating after reach addition. Continue this until all the sugar has been incorporated and the icing is light and spreadable.

3) Cut the cakes: Align the warm and cold colours next to each other as the picture above. With the circular cutters, cut each cake into two concentric circles and one small circle from the centre. Carefully mix and match the pieces of cake so there are three different colours in each circle.  Repeat this process until no ring or circle is next to another of the same colour. Once you're happy, stick these in place with butter cream Aim to use no more than a quarter of the buttercream for this.


4) Stack the cakes together with another quarter of the buttercream icing. Next use the rest of the icing to cover the top and sides of the whole cake. Refrigerate for an hour or so to allow the icing to set. This makes the next stage less fiddly.

5) Make the royal icing: Whisk the egg white until frothy - but not stuff - sieve a couple of tablespoons of icing sugar into the egg whites, adding the glycerine and lemon juice. Beat until smooth. Continue to sieve in the rest of the icing sugar, mixing after each addition, until a thick but spreadable consistency has been achieved. If it's too runny, add more icing sugar and if it's too thick add a dash of water. Cover with a cloth for 20-30 minutes to allow any air bubbles in the icing to disappear. Take 5-6 tablespoons of icing and place in a separate bowl for decorating the cake later.

6) Decorate the cake: Spread the royal icing onto the top of the cake, allowing it to cascade over the sides. Then continue to spread the icing around the sides until  the whole cake is covered. Allow to dry for an hour or so before decorating

7) For the decoration: Divide the remaining icing into 6 separate small containers like a mug and colour each little portion of icing in the colours you used for the cakes (blue, green, purple, yellow, orange and red) Place these into 6 separate disposable piping bags and pipe a rainbow style boarder around the cake (use your own imagination with this ;) ) I dusted mine liberally with glitter because...well why not? Allow to set before amazing everyone with this technicolour dream cake. Yeah that's right, I made THAT reference.