So it was my turn on the weekly cake rota in my German class
on Thursday and I racked my brains for a while to think what I could make that’s
acceptable to eat at 10:30 in the morning. I mean…chocolate fudge cake is not
really elevenses material is it, nor is a salted caramel cupcake. I thought it
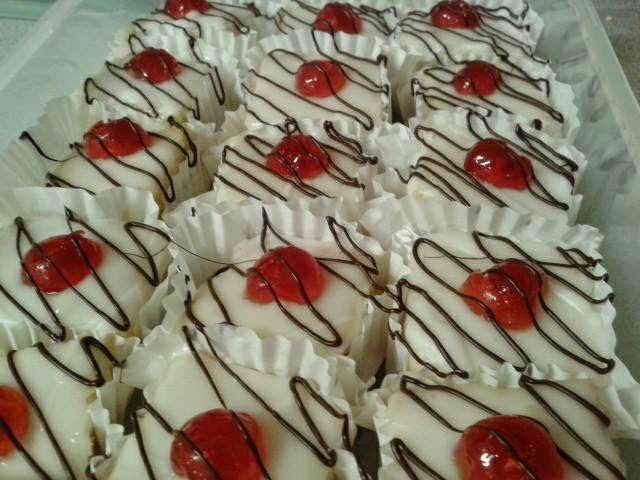
had to be something basic basic but also a bit pretty too. Then fondant fancies
came to mind because they’re light, not too sweet and actually quite
impressive-looking when they’re finished! For some reason I thought one tray
would not suffice so I did two, which then lead onto two different flavours of
fondant fancies, which then lead to 40 cakes!!! What was a light bake for my
class turned into a cake mission, but I’m not complaining- the result was well
worth it!
Now you’d think 40 cakes!!! Does this girl live with an
army?! Or is she just really hungry!? Well…I took 15 into my class, all of
which got eaten, and I left 25 in my flat. I came home and thought there is no
way we’re going to be able to eat 25 of these, I’ll have to take some to work…give
some to family…freeze some….
But oh no no no no no. It turns out as well as being lovely
people, my flat mates also have a talent for cake eating too (It's not been 2 days and we have one left minus its cherry...). So thanks to them
I can now bake much more frequently without worrying about the waste. I just
hope they don’t
think I’m trying to fatten them up…
Anyway here’s my recipes for Bakewell Fondant Fancies and
Plain Jane Vanilla ones:
BAKEWELL FONDANT FANCIES
For the Cake:
200g / 8 oz caster sugar
200g /8 oz margarine
150g / 6 oz self-raising flour
50g / 2 oz ground almonds
1tsp almond extract
For the Filling:
6 tbs apricot jam
4 tbs strawberry/raspberry jam
250g / 10 oz white marzipan
For the Icing and
Extras:
750g fondant icing sugar
6-8 tbs water
20 halves of glacé cherries
75g / 3 oz dark chocolate
*muffin cases
1) Preheat oven to 180°C / Gas 4. Grease and line a deep rectangular
tin approximately 6 x 8 inches.
2) Make the Cake:
Cream margarine, caster sugar and almond extract together until pale. Beat the
eggs in a separate jug and sieve the flour and ground almonds into a third. Add
a third of the flour and egg mixture at a time and beat after each addition,
until a smooth batter is formed (It should be a ‘just drops off the spoon’
consistency). Spoon the batter into the tin and bake for 25-30 mins, or until
springy to the touch and an inserted skewer comes out clean. Turn out onto a
wire rack and allow to cool.
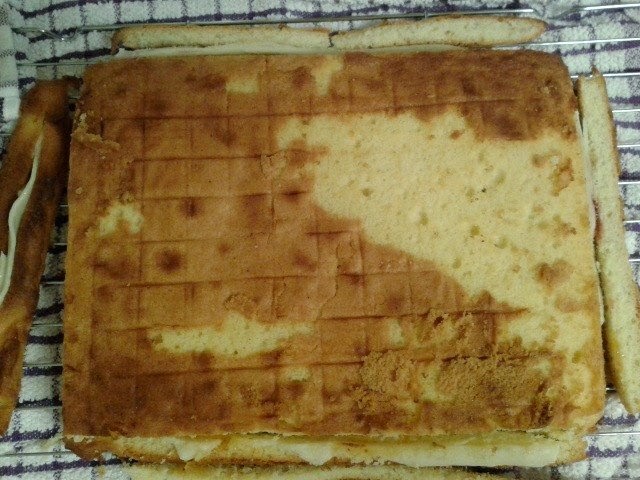
3) Fill the Cake:
Once cooled, carefully trim up the top and edges until they’re straight and slice
the sponge in half horizontally. Spread each half with the apricot jam.
Sprinkle the work surface with a little icing sugar and roll out half of the
marzipan at a time, roughly the shape of the cake and place each half onto the
cake halves. Spread one of the halves with the strawberry or raspberry jam and
sandwich the other cake on top. Chill the cake for about 1 hour, to make the
cake more manageable.
4) Measure the cake and divide into 20 squares (I found that
4x4.5cm worked best). Place the cakes on a wire rack, with a baking tray or tin
foil underneath it – it’s about to get rather messy ;).
5) Decorate the
Fancies: Sieve the icing sugar into a bowl and add the water sparingly
until a runny paste is formed, just thinner than the consistency of golden
syrup. Spoon a tablespoon-worth amount of icing over each cake and encourage it
to go over the sides with the spoon or a knife. Give each cake a good spoonful first
before you do any fill in the gap/ touch ups on any of the cakes. Place a
cherry half on each cake and allow to dry for a couple of minutes.
6) Meanwhile
fold the muffin cases out flat; imagining a square base, fold edges into the
middle four ways to make a kind of square shape.
Take each cupcake and place in
a case, roughly wrapping the sides around the cake to make sure it sticks to
the icing. Tightly pack the fancies in the tray you baked the cake in, to
encourage the cases to stick to the cakes in a square shape.
7) Melt the chocolate and allow to cool. Once the icing is
dry, pipe or drizzle the melted chocolate over the fondant fancies. Devour.
-------------------------------------------------------------------------------------------------------------------------
PLAIN JANE VANILLA
FONDANT FANCIES
For the Cake
200g / 8oz caster sugar
200g/ 8oz margarine
200g / 8 oz self-raising flour
4 eggs
1-2 teaspoons vanilla extract.
Decoration
Buttercream:
150g / 6 oz icing sugar
75g / 3 oz soft unsalted butter
1 tsp vanilla extract
Iced Topping:
750g / 1 lb 14 oz fondant icing sugar
8 tbs water
food colourings (pink, blue, green, yellow etc)
Muffin cases
75g chocolate of your choice (white, milk or dark)
*Any sprinkles, glitters etc that take your fancy.
1) Preheat oven to 180°C / Gas 4. Grease and line a deep
rectangular tin (8x12 inches approximately).
2) Make the Sponge:
Cream the margarine, caster sugar and vanilla extract until pale. Beat the eggs
in a separate jug and sieve the flour into a separate bowl. Add a bit of flour
and egg at a time to the butter-cream and mix to combine after each addition.
Repeat until all ingredients are used up. Spoon into the tin and bake for 25-30
minutes until golden, springy to the touch and a skewer comes out clean. Turn
out onto a wire rack and allow to cool. Trim the edges until they are straight,
including the top if it’s a little uneven.
3) Make the
Buttercream: Put the butter and vanilla extract in a bowl. Gradually beat
in the icing sugar (so as to avoid an icing sugar cloud), until the icing is
pale and spreadable. Smooth 2/3 of the icing onto the cooled cake, taking care
to make the surface as even and flat as possible. Chill for an hour to set the
icing, and keep the rest of the buttercream alongside it in the fridge (I find
it easier to leave the icing in a piping bag so it’s ready to use in the next
step.
4) Once chilled enough, measure and divide the cake into 20
square cakes (4x4.5cm did it for me). With a round nozzle pipe a globule of
icing onto the centre of each square. You can chill the cakes again after this
step for 30 minutes or so, but I didn’t find it necessary.
5) Make the Iced
Topping: Sieve the icing sugar into a bowl and sparingly add the water
until it forms a smooth runny paste, just thinner than golden syrup. Divide
into as many bowls as you have food colourings. Colour the icing as desired and
pour a heavy tablespoonful onto each cake, encouraging it to fall over the
sides (be wary of the buttercream dome though!). Try to leave icing remaining
so you can fill in any gaps left over. At this stage, add any sprinkles you
fancy. Allow to set a little.
6) Meanwhile flatten out the muffin cases and fold the edges
in four ways, as if the base is a square. Place each fondant fancy into a case
and fix the sides to the icing. Tightly pack them into the rectangular baking
tin you baked the cake in, so that the cases stick to the fancies. Allow to
dry.

7) Melt your chosen chocolate and allow to cool before
piping or drizzling over the fondant fancies. I also like to finish them off
with a sprinkle of glitter. Enjoy.